Manage workspaces in Microsoft Playwright Testing Preview
In this article, you create, view, and delete Microsoft Playwright Testing Preview workspaces. You can access and manage a workspace in the Azure portal or in the Playwright portal.
The following table lists the differences in functionality, based on how you access Microsoft Playwright Testing:
| Functionality | Azure portal | Playwright portal | Learn more |
|---|---|---|---|
| Create a workspace | Yes | Yes | Quickstart: run Playwright test in the cloud |
| View the list of workspaces | Yes | Yes | View all workspaces |
| View the workspace activity log | No | Yes | Display activity log |
| Delete a workspace | Yes | Yes | Delete a workspace |
| Configure region affinity | Yes | No | Configure region affinity |
| Grant or revoke access to a workspace | Yes | No | Manage workspace access |
Important
Microsoft Playwright Testing is currently in preview. For legal terms that apply to Azure features that are in beta, in preview, or otherwise not yet released into general availability, see the Supplemental Terms of Use for Microsoft Azure Previews.
Prerequisites
- An Azure account with an active subscription. Create an account for free.
Create a workspace
To get started with running your Playwright tests on cloud browsers, you first create a Microsoft Playwright Testing workspace. You can create a workspace in either the Azure portal or the Playwright portal.
When you create a workspace in the Playwright portal, the service creates a new resource group and a Microsoft Playwright Testing Azure resource in your Azure subscription. The name of the new resource group is based on the workspace name.
Sign in to the Playwright portal with your Azure account.
If you already have a workspace, select an existing workspace, and move to the next step.
Tip
If you have multiple workspaces, you can switch to another workspace by selecting the workspace name at the top of the page, and then select Manage all workspaces.
If you don't have a workspace yet, select + New workspace, and then provide the following information:
Field Description Workspace name Enter a unique name to identify your workspace.
The name can only consist of alphanumerical characters, and have a length between 3 and 64 characters.Azure subscription Select the Azure subscription that you want to use for this Microsoft Playwright Testing workspace. Region Select a geographic location to host your workspace.
This is the location where the test run data is stored for the workspace.
Select Create workspace to create the workspace in your subscription.
During the workspace creation, a new resource group and a Microsoft Playwright Testing Azure resource are created in your Azure subscription.


Display the list of workspaces
To get the list of Playwright workspaces that you have access to:
Sign in to the Playwright portal with your Azure account.
Select your current workspace in the top of the screen, and then select Manage all workspaces.

On the Workspaces page, you can now see all the workspaces that you have access to.
The page shows a card for each of the workspaces in the currently selected Azure subscription. You can switch to another subscription by selecting a subscription from the list.

Tip
Notice that the workspace card indicates if the workspace is included in a free trial.
Select a workspace to view the workspace details and activity log.


Display the workspace activity log
You can view the list of test runs for the workspace in the Playwright portal. Microsoft Playwright Testing only stores test run metadata, and doesn't store the test code, test results, trace files, or other artifacts.
The workspace activity log lists for each test run the following details:
- Total test duration of the test suite
- Maximum number of parallel browsers
- Total time across all parallel browsers. This is the time that you're billed for the test run.
To view the list of test runs in the Playwright portal:
Sign in to the Playwright portal with your Azure account.
Optionally, switch to another workspace by selecting your current workspace in the top of the screen, and then select Manage all workspaces.
On the workspace home page, you can view the workspace activity log.


Delete a workspace
To delete a Playwright workspace:
Sign in to the Playwright portal with your Azure account.
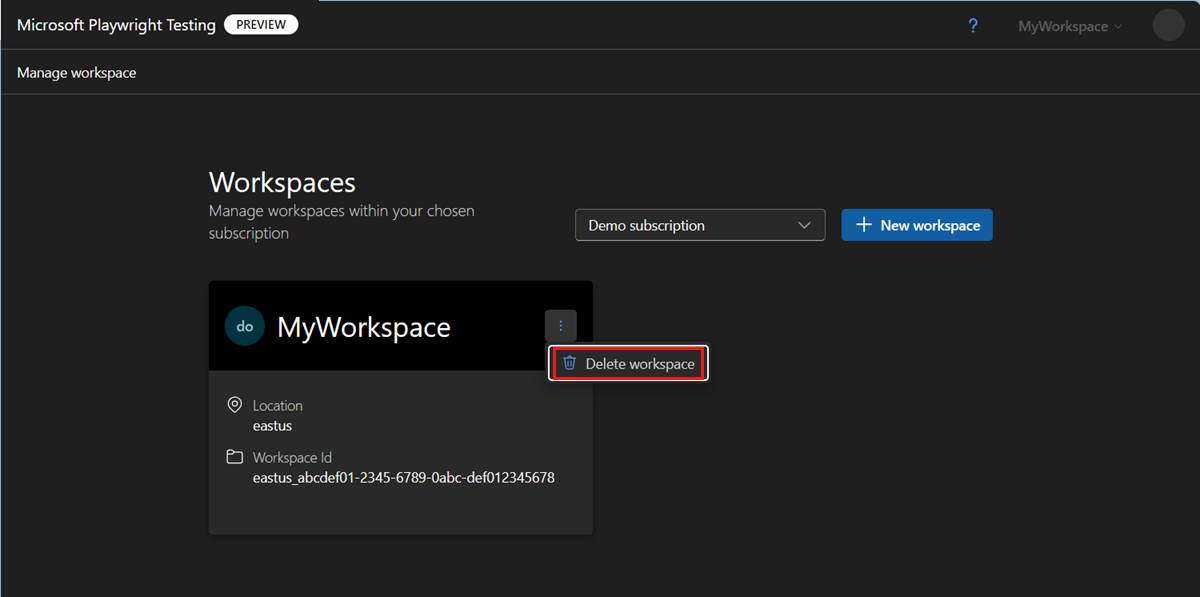
Select your current workspace in the top of the screen, and then select Manage all workspaces.
On the Workspaces page, select the ellipsis (...) next to your workspace, and then select Delete workspace.
On the Delete Workspace page, select Delete to confirm the deletion of the workspace.
Warning
Deleting a workspace is an irreversible action. The workspace and the activity log can't be recovered.


Related content
Get started with running Playwright tests at scale
Learn more about the Microsoft Playwright Testing resource limits
Feedback
Coming soon: Throughout 2024 we will be phasing out GitHub Issues as the feedback mechanism for content and replacing it with a new feedback system. For more information see: https://aka.ms/ContentUserFeedback.
Submit and view feedback for